

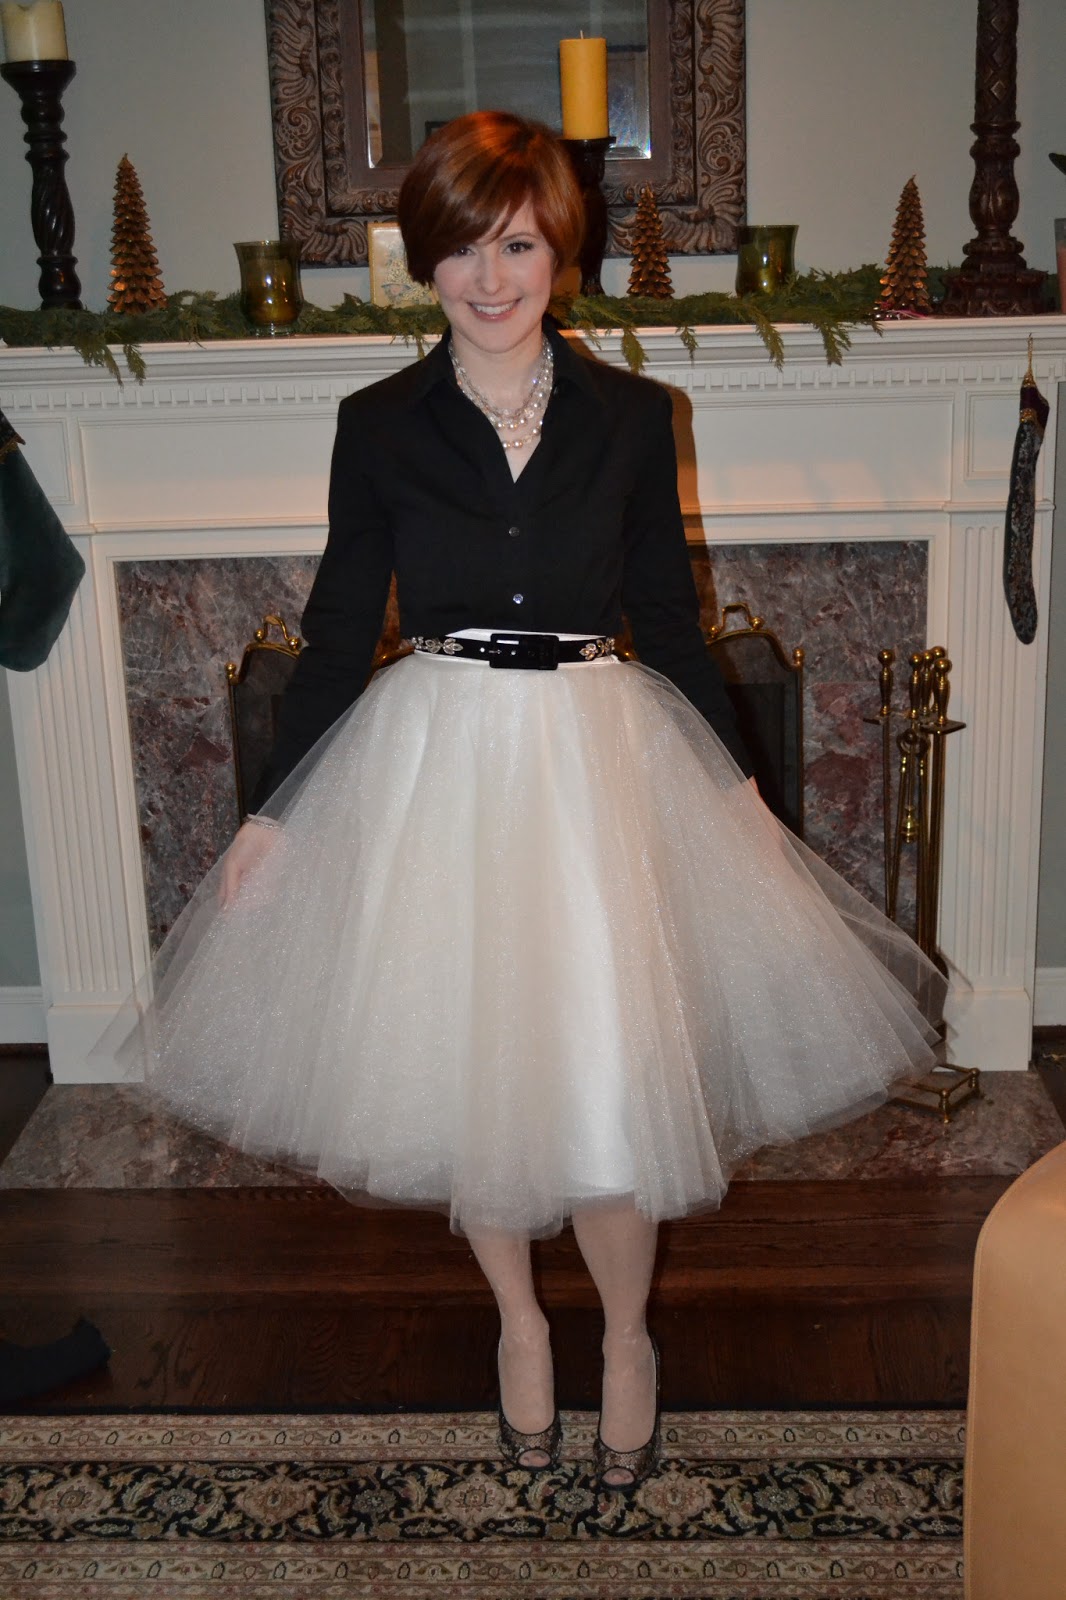
Ever since I saw the Anthropologie Tulle Skirt last fall I have been Smitten. It was so popular it completely sold out with in a matter of 2 short months. But, luckily it has also become a sort of blog-o-sphere legend. MANY posts have been written about how to wear it, style it and even how to sew it.... I decided to do it all. I mean what could be that hard about a skirt, right? A little tulle and some Ribbon? As I eventually found out, not so. FIRST, I wanted to do my homework so this little project didn't turn into a New Years holiday DIY disaster of epic proportion. After all, I didn't want to end up going naked into the new year!
So, it is here that I chronicle my journey. I am doing it for all those brave enough to come behind me. I will do my best to help you learn from my mistakes.
The adventure began with late night fervent Google searches to find out the very best way to replicate this WHITE confectioners dream....
As not to steal anyone's thunder and am listing bellow all the various sources I found helpful in putting my skirt together. I thank them ALL mightily for their wealth of information.
Okay Girl, Just get to it....
I want to state, for the record I went into this thinking that I'd just gather up some tulle and stitch it into a waist band. It got a lot darker and more twisted as I became hypnotized by the beauty of the tulle.... initially I bought 10 yards of tulle and started to pleat it as but, after doing that I realized it was going to be way too poufy for my taste. SO, if your like me you don't want to look like a giant snow drift you will want to make it a like Cotton and Curls Circle skirt.
(*Note: I will not be detailing the circle skirt process. So you should follow Cotton and Curls directions on how to create that patten).
(*Note: I will not be detailing the circle skirt process. So you should follow Cotton and Curls directions on how to create that patten).
If you get the wide tulle you will want to get about 6-8 yards. I had to get 16.
Step One: THE Tulle. I bought the standard 54"tulle.


YOU will want the wide tulle which is 108" wide. This will become glaringly obvious WHY when you go to cut it out. When you cut a circle skirt you need a LOT of width because you'll be folding it. Next you have to wash it in fabric softener (I used Ultra Downy Free and Sensitive because I'm allergic to chemical smells). This helps A LOT!!!! Don't skip this step! Tulle is stiff right off the bolt. Once washed and ironed it drapes much more nicely (and has less static-cling). Make sure to use a press cloth otherwise you'll melt the tulle!
Step 2: The Underskirt. You want to make the underskirt as opaque as possible because the tulle is very sheer. I used 2 layers of white poly-satin. Trust me, it will pay off in the long run. It beats trying to find a slip the right length later on. I just made a simple A-line skirt. You can also make it just like the circle skirt method.
But here's how I made mine:
Measure your waist and make the front waist measurement your waist size (plus seam allowance). Examp. my waist is 24" and my hips are 34". So I made my front skirt 12". The back of the skirt I added the difference between my Waist Measurement and my hip measurement which is 10". Hence, I cut the back piece 22". It's up to you how long you want to cut the skirt. Depending on your height you'll want it to be longer or shorter. I made mine to hit about an inch or two under my knee.

Step 3. Once you've got it all cut out you must carefully pin little pleats all along the waist and then baste the layers one by one on to your under skirt. I sewed 6 layers. You can add more or less depending on your preference. Some of the layers will be pleated and some wont. I made mine with 3 pleated layers and then added 3 non-pleated layers on top. This layering along with pleating will give it a more pleasing drape and much smoother waist line than just simply gathering it.
Step 4. Music.
You will need A LOT of music.

Step 5: The Waistband.
Here is a diagram for the waistband pattern.
You can use any width of elastic you want. I used a wide elastic.
The key with the waist band is to use a very stiff interfacing on the front to
get a smooth pucker-free waist band.
You want the back to gather easily with the elastic. So I used a very soft flexible
interfacing - just enough to keep it from slipping around
as I was sewing it.


 Here's what the waist band looks like sewn on half way and inside out.
Okay, so Here's where it gets a little hairy..........
Press your waist band in half. Then sew the ends together. Stop at the fold line where you have pressed and use the basting stitch length on your machine. (you will need to open the waist band up to insert your elastic later.
Sew the waistband on to your skirt with all of the layers to the wrong side of the skirt. Then you will fold over the waist band with the pressed seam allowance and use your narrow edge hem foot to stitch along the front.
Pin the elastic on one open end. Use a safety pin to thread the elastic through the waistband to the other end. Insert a bit of the elastic into the Front part of the inside of the waist band. Then top-stitch it down or zig-zag over the seam. Repeat on other end.
This last part requires patience. Go slow as you stitch the waist band down
over it self.
 Have fun and remember. Kittehs love tulle and Happy New Year!!

Here is a diagram for the waistband pattern.
You can use any width of elastic you want. I used a wide elastic.
The key with the waist band is to use a very stiff interfacing on the front to
get a smooth pucker-free waist band.
You want the back to gather easily with the elastic. So I used a very soft flexible
interfacing - just enough to keep it from slipping around
as I was sewing it.


Cut your elastic to 1/2" of your waist measurement plus 1". You can adjust as needed depending on how loose you want it to be.
The tutorial on how to insert the elastic is here.
The live journal blog is a loose guide. She got all uber fancy with a zipper AND an elastic waistband.

Okay, so Here's where it gets a little hairy..........
Press your waist band in half. Then sew the ends together. Stop at the fold line where you have pressed and use the basting stitch length on your machine. (you will need to open the waist band up to insert your elastic later.
Sew the waistband on to your skirt with all of the layers to the wrong side of the skirt. Then you will fold over the waist band with the pressed seam allowance and use your narrow edge hem foot to stitch along the front.
Pin the elastic on one open end. Use a safety pin to thread the elastic through the waistband to the other end. Insert a bit of the elastic into the Front part of the inside of the waist band. Then top-stitch it down or zig-zag over the seam. Repeat on other end.
This last part requires patience. Go slow as you stitch the waist band down
over it self.

super elegant.. thanks for sharing
ReplyDeleteThank you!
Deletegreat tutorial, did you cut the tulle the same way as the A-line skirt in step 2?
ReplyDeleteNo, I cut the tulle in semi - circle pieces like a fifties circle skirt. The lining was just cut on the bias in a A frame shape. Hope this helps!
DeleteAll we love the seams have kittens companions <3
ReplyDeleteI love your skirt. Question,How did you stitch the seams together with the front piece and back piece along the sides? I always struggle with that piece of the tulle party. A picture would be even better! ;)
ReplyDelete